Troubleshooting
Over the years, we have acquired in depth knowledge of the products we carry and here, we present this information in an organized Q & A format so you can easily locate your issue and the respective solution.
We are also ready to answer any of your questions by phone, just call 0911 42 2943
Multipoint Workstation (4)
Latest Skype versions are known to have problems working on Multipoint Server 2011, but version 4.2.0.163 has been thoroughly tested and works well. You can download it from here:
http://www.oldapps.com/skype.php?old_skype=90?download
iTimer was created for Windows Xp and therefore can not be used with Multipoint as the operating system is Windows Multipoint Server 2011 (64-bit). However you can download use True Cafe with Multipoint.
The multipoint stations have two USB ports, you can use a simple USB hub (see picture) to add more ports to your station so you can plug in devices such as web cam, flash disk etc.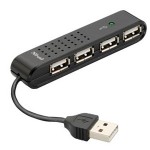
This might be due to various reasons. Please make sure you do as follows.
- If you are using USB keyboard and mice for the server, these should be plugged in on the USB hub and NOT on the server it self.
- You must use a powered USB hub (sometimes an un-powered USB hub might work). A powered USB hub is one that its own power source (an adapter) that is plugged in to a source (plug).
- You must have all the multipoint terminals, their keyboards and mice plugged in before starting the computer.
PC-Station (17)
This is usually caused by a software called Deep Freeze. If you have it installed then make sure you disable it (by holding the shift key and double clicking on the Deep Freeze icon near the system time, bottom right of your screen) and then restarting your system 2 or 3 times until the keyboard and mice are recognized. Once that happens, you can re-enable Deep Freeze.
If it is just one or two of your mice or keyboard that are not working, this might be a faulty or too long network cable. Remember that you can not make your cables longer than 9 meters using cat6e cables and 5 meters using cat5e cables.
Unfortunately, there was an error in some of the PC-Station CDs that caused it to ask you to correct the date when it is already the correct (Gregorian) date.
To do the installation, browse the CD, go in to the PC-Station folder on the CD and then run the file “pcstn.exe”. This will start the manual installation which you can complete by following all the steps.
If your two terminals are working but only one is showing a “Station starting…” or “Station stopped” message then it is most likely a driver issue.
Go into the Device Manager (by right clicking on My Computer, choosing properties and then going to the Hardware tab and then clicking the Device Manager button) and under “Display adapters” you will find three X300 … items listed. Uninstall each one by right clicking on it and choosing uninstall. When you have uninstalled all three, reboot your computer and follow the steps. Your third terminal that wasn’t working should be working now.
You can download and install (works only on Windows XP) from here:
https://drive.google.com/file/d/0B2Jyt6TfySBwLV9weXRPRWV0c3c/view?usp=sharing
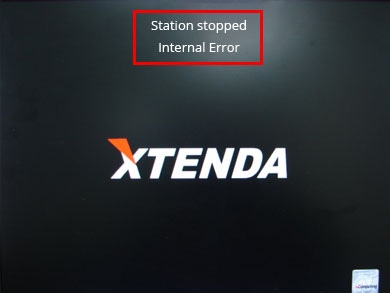
- You have not entered serial numbers for all the stations. In this case, you will see a prompt on the host (main) computer asking you to enter a serial number. You can get the serial numbers on the back of each terminal (small black box)
- You have changed the date on your computer. In this case, just change back the date to the correct (current) date and restart your computer. If after having adjusted the date and restarting the computer you still find the error displayed, go in to the “C:\Windows\system32” folder, locate the file called “oemebios.bin” and delete it. Then uninstall and re-install the PC-Station software (NCX-2000XP). This will solve your problem. Please remember that the date on your computer should always be the correct (current) date.
If you see a message that says “Winlogon Terminated” on the stations then that means your windows xp installation has become corrupt. The easiest way to fix this is to install a fresh copy of Windows XP, from another Windows XP setup CD. Preferably, find a clean service pack 3 version.
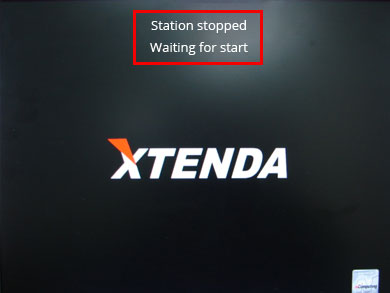
- You have an anti-virus or firewall software blocking the pc-station software from starting. In this case, just uninstall all anti-virus software (such as Kaspersky, Avira, AVG and Avast) and then restart you computer. The stations should now start working. If you have Kaspersky installed, you might get a fatal error blue screen, in this case, boot using safe mode, uninstall the pc-station software, uninstall Kaspersky and then after having booted normally you can reinstall the pc-station software, NCX-2000XP)
- There is a driver issue. Go in to device manager, under “Display Adapters” you will find three items with the name “X300 Graphics Controller”. Right click on one and select “Uninstall”. You will be prompted to restart the computer. After the restart the stations should be re-detected and all should work.
If the serial numbers on the back of the terminals get lost or become unreadable, you can find six more serial numbers in the “Additional Software” folder of the PC-Station Installation CD. If you can’t somehow find them there, here are twelve serial number and activation keys you can use…
Please remember that you can use any serial number (different from the one given on the back of the terminal) as long as it is a valid serial number.
| Serial No. | Activation Key |
| 3525565 | 216995-344212-662507 |
| 3525566 | 103123-213873-102947 |
| 3525567 | 341260-623473-243137 |
| 3525568 | 852896-838033-439329 |
| 3525569 | 383020-522299-015425 |
| 3525570 | 452584-634342-407604 |
| 3525932 | 432896-518063-200315 |
| 3525973 | 472318-575048-816652 |
| 3525974 | 411863-420426-736836 |
| 3525975 | 135597-620542-547832 |
| 3525976 | 263869-164963-787962 |
| 3525977 | 981756-444123-898151 |
Yes, it is incompatible with Dell Optiplex 745, 755 and 360/380.
It will also not work on some assembled computers with the Intel G33/31 Express chipset.
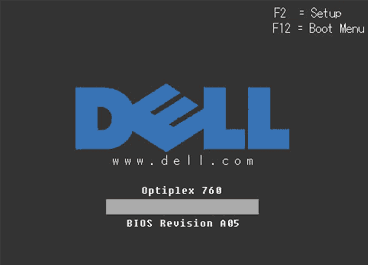
Dell Optiplex 760 and 780 are compatible and can be used if their BIOS versions are above 8.
You can check this when you computer first boots up (as shown in the picture below). If your computer has an older BIOS version, you can download the updates from Dell.com through the following links:
Dell Optiplex 760 Latest BIOS Update (A13)
Dell Optiplex 780 Latest BIOS Update (A12)
When attempting to run Firefox on more than one station, you get the following error or one similar to it. Firefox is already running, but is not responding. To open a new window, you must first close the existing Firefox process, or restart your system.
The solution is to have each station login using a unique login name to Windows in order for Firefox to launch on multiple stations.
Logging in each station as a user that is unique to that host circumvents this. An example would be to log the host in as admin, station #2 in as pc1, station #3 in as pc2 and so on. It’s not necessary that the usernames be unique on the network, just unique for each host.
An authorization error usually occurs when more than one system in a LAN has the same serial numbers assigned to the system. In this case, the first PC to be turned on does not suffer an authorization error, but any subsequent PC’s which contain the same serial number will experience the issue. To remove these duplicate serial numbers, delete them from the host PC they are installed on.
- Access the NConsole application by either:
- Click “Start” > “All Programs” > “NCX-2000-XP” > click on the entry labeled “NCX – 2000 – XP”
- Double-click the NCX-2000-XP console application icon in the system tray
- In the left-hand pane, navigate to “Local Settings” > “Information and Settings” > “Serial Numbers”
- To remove serials, right-click on the number and select “Delete”
If the color on your station’s screen is bad, clouded over with green, yellow, red etc as seen in the picture below then this is most probably a network cable or a VGA cable issue.
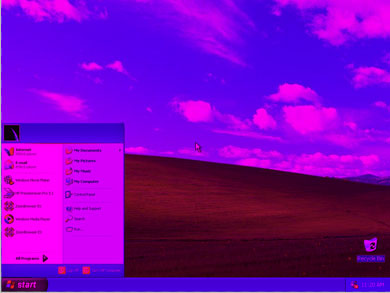
- Make sure your monitors VGA cable is working (try using another one that is known to work)
- Make sure that you are using CAT6e cables
- Re-do the crimping on both sides of the cable
- Make sure that you have not exceed the maximum allowable limit of 5 meters for cat 5e cable and 9 meters for cat 6e network cable
The following steps can be used to disable (Thaw) Deep Freeze:
- Hold down the SHIFT key and double-click the Deep Freeze icon. Alternatively, you can press CTRL+ALT+SHIFT+F6. A Password dialog is displayed.
- Enter your password and click OK. If you have not yet entered a password you should be able to click OK without entering a password. The Boot Options dialog is displayed.
- Select “Boot Thawed” and click OK. This will disable Deep Freeze on the next reboot.
- The same steps can be used to enable (Freeze) Deep Freeze. The only change is to select “Boot Frozen” instead of “Boot Thawed”.
Yes, this is a must!
You need to install the VGA (Graphics) driver for your computer before you can install and use the Multipoint driver software.
You need to locate and install the VGA driver compatible with Windows 7, 64-bit.
Here are some drivers (download links) for a few common computer models (for Windows Multipoint 2011 Multipoint Server OS)
- Dell Optiplex 620/745/755 Graphics Driver
- Dell Optiplex 760/780 Graphics Driver
- Dell Optiplex 790 Graphics Driver
For Intel based computers, most drivers can be found on
Intel’s Download Center: http://downloadcenter.intel.com/
Since the terminals are powered by the host computer’s motherboard, the sound output is somewhat less than that of the host computer. To optimize the sound coming from the devices, we recommend using amplified headphones, or standard headphones in conjunction with amplified speakers. Additionally, the terminals are set to a default sound level of 10%, which can be changed in Windows’ advanced sound properties on each station.
With the exception of a few anti-virus software that are not compatible with the PC-Station software you can use most.
Anti-virus that are known to cause problems are:
- Avira, AVG, Avast and Kaspersky
You can safely use
- Microsoft Security Essentials
- Norton, Symantec, McAfee, eScan, NOD32 etc.
Disable Deep Freeze before uninstalling it.
To disable Deep Freeze:
- Hold down the shift key and double-click the Deep Freeze icon. Alternatively, you can press CTRL+ALT+SHIFT+F6.
- Enter your password and click OK.
- If you have not yet entered a password you should be able to click OK without entering a password.
- The Boot Options dialog is displayed. Select “Boot Thawed” and click OK. This will disable Deep Freeze on the next reboot.
- Reboot your computer. After the computer reboots, you are ready to uninstall Deep Freeze.
To uninstall:
- Locate the installation file you used to install Deep Freeze on your computer. (If you installed it from the PC-Station CD, insert it now)
- Run the installation file.
- Select the option to “Uninstall”
Deep Freeze is uninstalled and your computer is rebooted.
iTimer (5)
You can do this by using the “Advanced” button on the iTimer installer.
Consult the iTimer Insallation Guide here:
http://www.amestsantim.com/itimer-installation/
The default password for the iTimer Server is “itimer” for the most recent version and “adminPass” for older versions.
The default user id and password for iTimer Client is “admin” and “itimer” respectively.
You can change the default password both on the server and the client by using the Change Password feature.
Yes, you can use them together but you have to make sure that iTimer is installed on a drive (partition) that has not been “frozen” by Deep Freeze. If that is the case, you will not be able to get meaningful reports from iTimer since the usage data will be erased by Deep Freeze after every restart.
You can do this by signing in on the iTimer Client and then right clicking on the iTimer Client from the task bar and selecting “Settings”. On the settings screen, you can change the name, phone number and motto that is displayed on the iTimer Client screens.
Consult the iTimer Insallation Guide here:
http://www.amestsantim.com/itimer-installation/
